VADIM
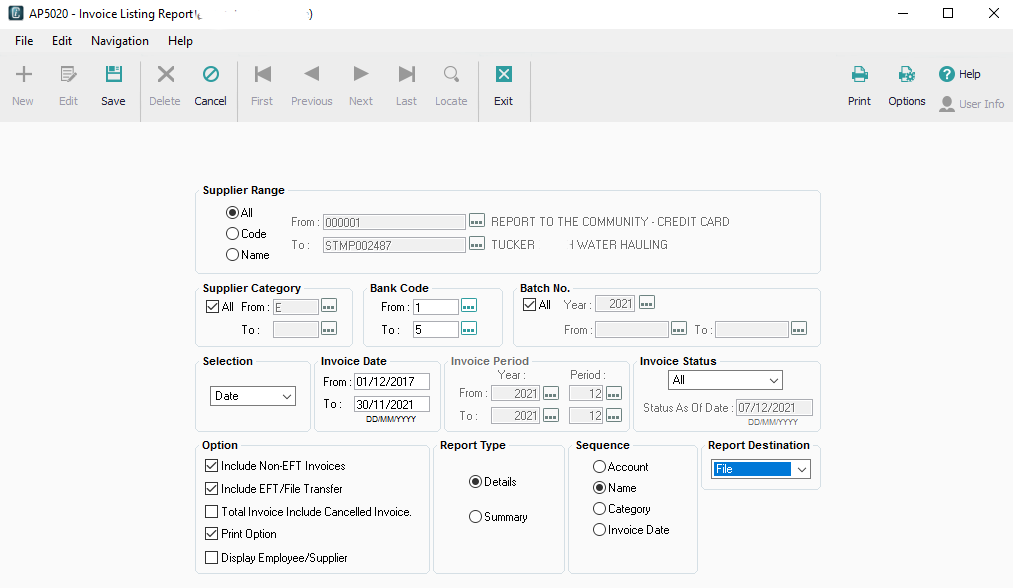
In newer versions of Vadmin you can run the AP5020 Invoice Listing Report
- Search for report named above
- iCity loads
- Defaults to Selection by Date, so change that to 4 year period start (default to is current)
- Select Options to Inlude Non-EFT Invoices, Include EFT/File Transfers, Print Option
- Change Report Type to Detail
- Change Report Destination to File
- Select a filename and location
- Save file as is, no need to convert to excel or anything
- Start Vadim
- (Click on) Financial
- Accounts Payable
- Reports
- Invoice Listing
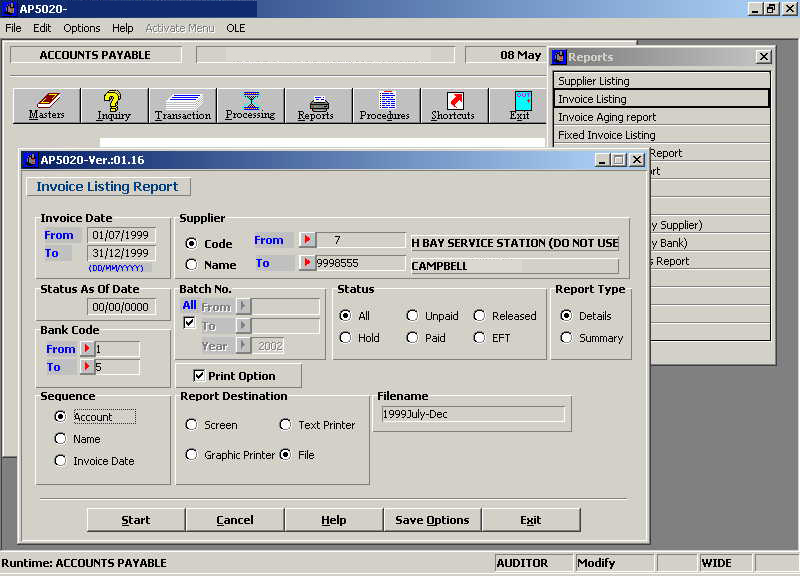
- Select the Invoice Date range. We can go back 4 years, but you probably want to start with a single year as large ranges can sometimes take a long time.
- Enter the Supplier range, choose either Code, or Name and Select the first supplier in your database in the From field and the last supplier in the To field.
- Make sure the Status As Of Date has either today's date or 00/00/0000.
- Batch No. should be All with a checked box.
- Status should be All.
- Report Type should be Details.
- Sequence depends on how you file your checks, if you file via batch mode, choose Account, if you file alphabetically, choose Name.
- Print Option should be checked,
- If there ia an option to "Reprint Previously Posted Journals" or similar, make sure it is selected.
- Report Destination should be file, and you should enter a filename, which identifies the report. Then click Start and it should generate the report.
The following steps describe how to create the "Invoice Listing Report - Detail" in older versions of VADIM:
The report will most likely go in your C:\vadim\ directory. If it does not appear there, you can find out where your report directory is by opening the Magic.ini file in your C:\Magic8\Deployment directory and search for an entry that looks something like this: repdir=C:\vadim\